How to Save Money and Time with DIY Lawn Aeration
Are you tired of spending countless hours and dollars on lawn maintenance every year? Look no further, because DIY lawn aeration is here to save the day! Not only does aerating your lawn improve air flow and nutrient absorption for healthier grass, but doing it yourself can also save valuable time and money.
Say goodbye to expensive equipment rentals and professional services – this step-by-step guide will have you well on your way to a luscious green yard in no time. So grab your tools and get ready to give your lawn the love it deserves without breaking the bank or sacrificing precious weekends!
Introduction to Lawn Aeration
Aeration is a process by which small holes are punched in the ground, allowing air, water, and nutrients to penetrate the grassroots. It is also one of the most important Lawn Care processes.
Lawn aeration can be done either by hand or machine. If you have a small lawn, you can do it by hand. Simply use an aeration fork (a special tool that looks like a garden hoe with tines) to poke holes into the ground at regular intervals. For larger lawns, you’ll need to rent an aeration machine, which is essentially a large roller with spikes that puncture the ground as you push it across your lawn.
There are many benefits to aerating your lawn. It helps to improve drainage and prevents soil compaction. It also encourages deeper root growth, leading to a healthier lawn overall. Aeration also allows water and nutrients to better reach the grassroots level, resulting in a green and luscious lawn.
While aeration is beneficial for any lawn, it is especially helpful for high-traffic areas or lawns that have been compacted by heavy machinery (like when a new home is built next door). If your lawn falls into one of these categories, be sure to aerate once or twice a year for optimal results.
Benefits of Lawn Aeration
Aerating your lawn allows water, nutrients and oxygen to penetrate the grass roots, leading to a healthier lawn. Aeration also relieves compaction of the soil, allowing the root system to spread and grow more easily. A strong root system is better able to withstand drought, disease and wear and tear. Lawn aeration is an important part of any lawn care regimen, but it can be expensive if you hire a professional service. Fortunately, lawn aeration is a relatively easy task that you can do yourself with a little planning and effort.
How to Prepare for DIY Lawn Aeration
Assuming you have the right tools for the job, lawn aeration is a relatively easy process. Aerating your lawn helps to improve drainage and soil quality, encourage root growth, and reduce compaction. The best time to aerate your lawn is in the fall, before the first frost. However, you can also aerate in the springtime, as long as the ground isn’t too wet.
To prepare for DIY lawn aeration, start by mowing your lawn shorter than normal. This will make it easier to aerate and help prevent scalping (the removal of too much grass). Next, mark off any areas that you want to avoid with either flags or chalk. This could include flower beds, gardens, or trees. Once you’ve marked off these areas, use a garden hose or turf paint to mark out a rectangle or square in your lawn where you’ll be working.
Now you’re ready to start aerating! For smaller lawns, you can use a hand-held core aerator; for larger ones, a walk-behind machine will be necessary. If using a hand-held tool, simply push it into the ground and twist slightly as you go. Be sure to overlap your strokes so that all areas are evenly covered. If using a machine, follow the manufacturer’s instructions carefully. As you aerate, cores of dirt will be pulled up from the ground; leave them on the surface of your lawn and eventually they will break down.
Once you’ve finished aerating, fertilize the lawn with a high-nitrogen fertilizer. This will help to stimulate root growth and promote healthy lawns. Finally, water your lawn deeply to settle the soil and maximize the benefits of aeration.
Steps to Do DIY Lawn Aeration
If you’re looking to save money and time on lawn care, DIY lawn aeration may be the answer. Aeration helps improve drainage and keeps your lawn healthy by allowing oxygen, water, and nutrients to reach the roots. It also reduces compaction, which can damage your lawn. Here are the steps you’ll need to take to do a DIY lawn aeration:
1] Prep your lawn: Water your lawn thoroughly a day or two before aeration. This will make it easier to penetrate the soil and reduce compaction.
2] Choose the right tool: You can use a hand-held aerator or a power aerator for this job. If you have a small lawn, a hand-held tool will suffice. For larger areas, you’ll need a power aerator.
3] Start aerating: Begin in one corner of your lawn and work your way across in rows. Lift up plugs of soil as you go (you should be able to see the cores of grass that have been lifted up). Aerate until you’ve covered the entire lawn.
4] Water properly: After aeration, water your lawn deeply and regularly to promote root growth and prevent compaction from returning.
5] Monitor your lawn: Keep an eye on your lawn over the next few weeks. If you see any signs of compaction or thatch buildup, repeat the process.
What to Consider When Doing DIY Lawn Aeration

There are a few things to consider before performing lawn aeration, such as the type of soil, whether the lawn is newly seeded or not, and what time of year is best.
Type of Soil: Different types of soil will require different amounts of aeration. For example, sandy soil may need more frequent aeration than clay soil. The best way to determine how often to aerate your lawn is to consult a professional or ask your local Cooperative Extension office. However, as a general rule of thumb, lawns should be aerated at least once a year.
Lawns that are Newly Seeded: If you’ve recently seeded your lawn, you’ll want to wait until the seeds have germinated and the seedlings have reached at least 3 inches in height before aerating. This ensures that the roots have had time to establish themselves and won’t be damaged when you start poking holes in the ground!
Best Time of Year: The best time of year to aerate your lawn depends on what type of grass you have. For cool-season grasses (like bluegrass or fescue), fall is the ideal time for aeration since this is when the grass is actively growing. For warm-season grasses (like bermudagrass or zoysiagrass), spring is the best time since this is when they begin growing after their winter dormancy period.
Tips and Techniques for DIY Lawn Aeration
1] Timing is everything when it comes to lawn aeration. The best time to aerate your lawn is in the spring or fall, when the grass is actively growing. Aerating during the growing season helps the grass roots take up more nutrients and water, resulting in a lusher, healthier lawn.
2] If you have a small lawn, you can aerate by hand with a garden fork or similar tool. Simply poke holes into the soil at regular intervals, being careful not to damage the grass roots.
3] For larger lawns, you’ll need a mechanical aerator. These can be rented from most home improvement stores or garden centers. Be sure to read the instructions carefully before using, as improper use can damage your lawn.
4] Once you’ve finished aerating, top dress the lawn with a thin layer of compost or sand to help fill in any gaps left by the aeration process. Then simply water as usual and watch your lawn green up in no time!
What Equipment You Will Need

If you’re not familiar with lawn aeration, it’s the process of perforating the soil with small holes to allow air, water, and nutrients to penetrate the grass roots. This simple process can have a big impact on the health of your lawn.
The best time to aerate your lawn is in the fall, when the weather is cooler and the grass is actively growing. But you can also do it in the spring, as long as there’s no risk of frost.
Here’s what you’ll need to do DIY lawn aeration:
1] A lawn aerator: You can rent one from a garden center or home improvement store, or buy one for around $100. If you have a small lawn, look for a manual aerator; for a larger lawn, go for a gas-powered model.
2] A stake or flag: To mark where you’ve already been so you don’t overlap areas (and waste time and effort).
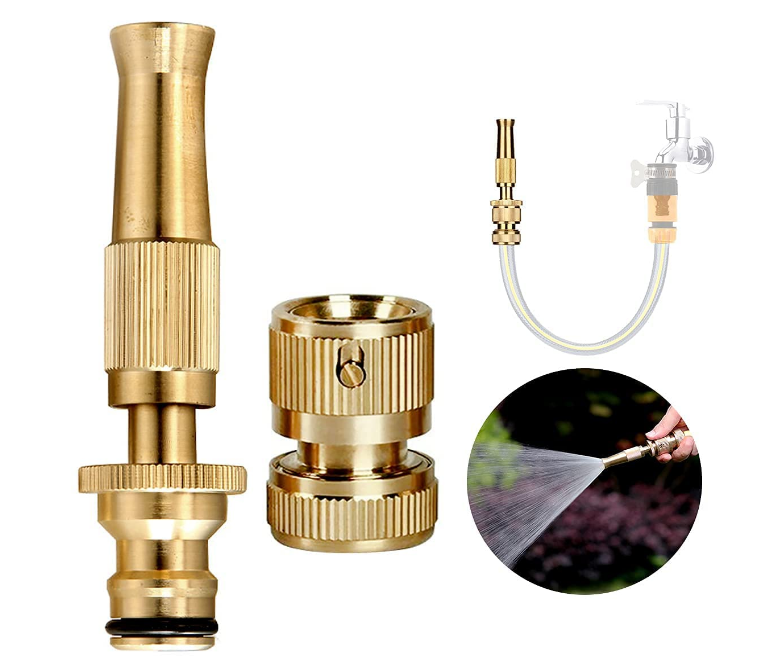
3] A garden hose: To connect your aerator to an outdoor faucet, if needed.
4] Water: To keep the soil moist while you’re working and for at least two weeks afterward (until the new plugs have had time to settle).
Alternatives to DIY Lawn Aeration
There are a few alternatives to DIY lawn aeration that can save you time and money. One option is to hire a professional lawn care company to do the work for you. This can be costly, but it will save you time and ensure that the job is done correctly. Another option is to use an aeration machine that you can rent from a local hardware store. This is a good option if you have a small lawn or if you do not want to deal with the hassle of manual labor.
Conclusion
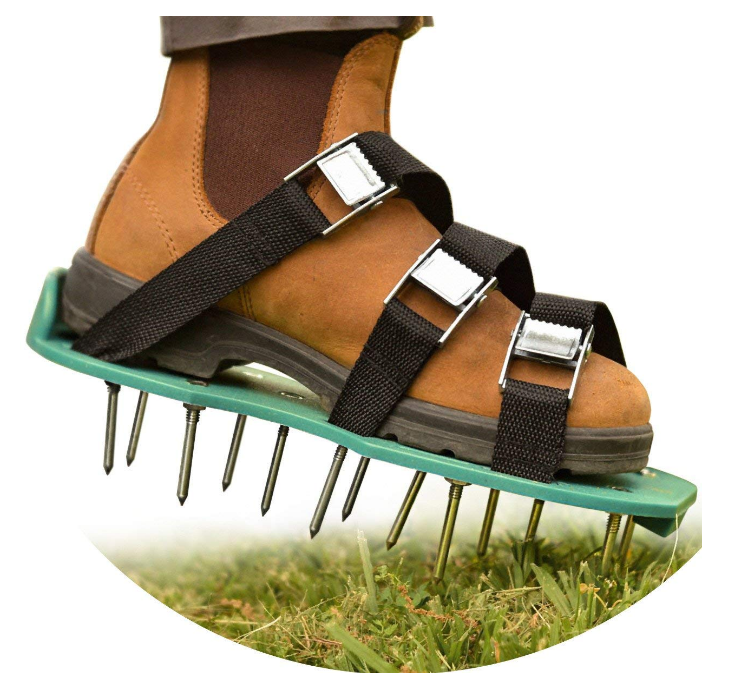
Having a lush, healthy lawn can be an intimidating task that requires plenty of time and money. However, with the right tools and techniques you can do it yourself! By aerating your lawn regularly, you will save both time and money while improving the overall health of your grass. So don’t hesitate to get started on DIY aeration this weekend – make sure to pick up some quality aerator shoes or plugs from your local hardware store for optimal results. With just a few simple steps you’ll have a beautiful yard before you know it!

James is a passionate writer and gardener with years of experience in home gardening. He is the author of several articles and blog posts on HomeGardenBlog.com, a platform where he shares his expertise and love for plants and gardening with the world.